Friday, September 14, 2007

12v Starter on 6v flywheel

Well here's an interesting discovery I would like to share. Some of the gurus might know this, but I haven't read anything on the Samba about it. I've found a way to run a 12 volt starter on a 6 volt flywheel with very little work involved.

This is an alternative to replacing the flywheel (& clearancing the bellhousing) or running a 6 volt starter in a 12 volt conversion. This could also be an alternative for running a 6 volt starter on a 12 volt flywheel (though I don't know if/why someone would need to).

So here's the rundown. I found that the bushing inside the 12v starter gear perfectly fits into the bushing in the 6v starter gear. This allows you to put the larger diameter 6v gear onto the 12v armature axle. why? so that you won't need to change flywheels to change starters, after a 12v conversion.

Now the only reason I even did this is that my 6v starter took a crap, and I had bought a new rebuilt 12v starter that I was going to cannibalize. Otherwise, the 6v starter does really well all juiced up on 12 volts, though it may help to replace the 6v solenoid with a 12v.

First things first. Unless you have more than one 12v starter lying around, you'll need to buy yourself one of those bushings for the 12v starter that fit in the bellhousing. do this before you go tearing into your starter. If you have more than one 12v starter then you're golden. I might even suggest it, so that you don't need to pull out the bushing already in there, which would be difficult with the engine still in the car.

Photobucket - Video and Image Hosting

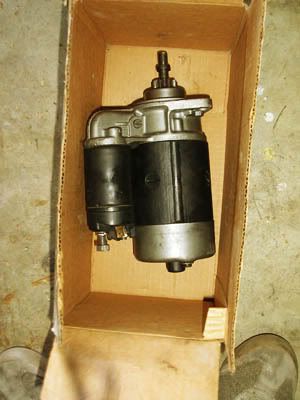
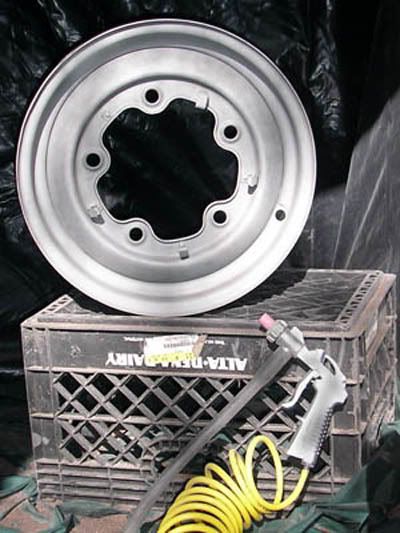
so here's the new rebuilt 12v starter that I got for a killer 55 bones.

First thing you'll need to do is begin disassembling the 6v starter. I don't think you need to take off the solenoid but it may make things easier.

Photobucket - Video and Image Hosting

The screws on these things are old! so use the correct screwdriver, or you'll strip it and have to drill it out like I did! Same with the other screws.

Unscrew the top nipple cover, and take out the retaining clip and washers. Then unscrew the two larger screws to take off the end cap. You may need to give the cap a hit with a hammer if it's stubborn.
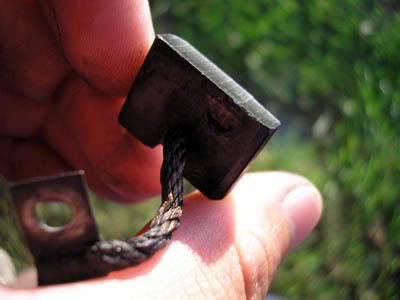
When you get it of, pull out the brushes that are connected to the case, you can leave the other two on. Then pull of the brush's bracket.

Photobucket - Video and Image Hosting

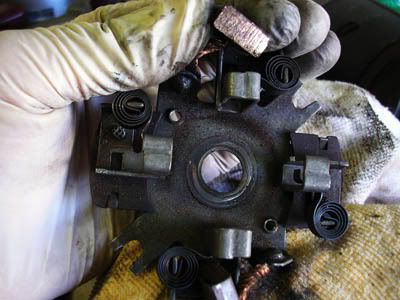
Check out your brushes. If their good, keep 'em around.

Photobucket - Video and Image Hosting

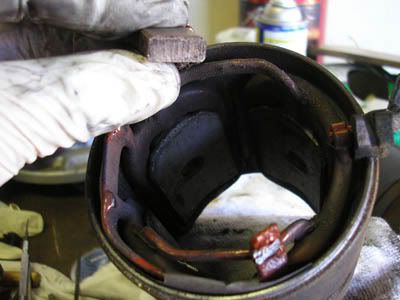
Same for the brushes on the case.

Now I read somewhere on the Samba that you can replace these brushes, but they are soldered on, and coated in enamel. I suppose you could replace them, but you'd be harder pressed to find new ones (or some you could make fit) than you would picking up an old starter with decent brushes.

Photobucket - Video and Image Hosting

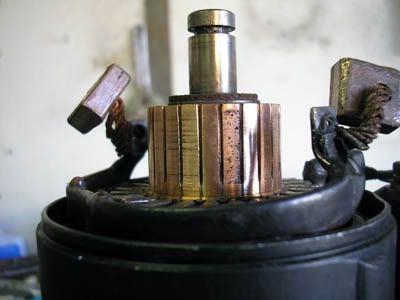
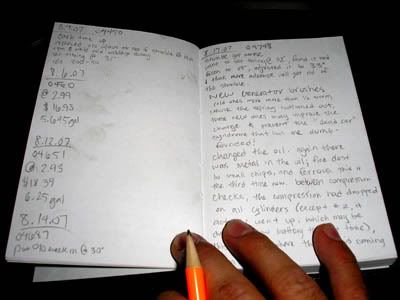
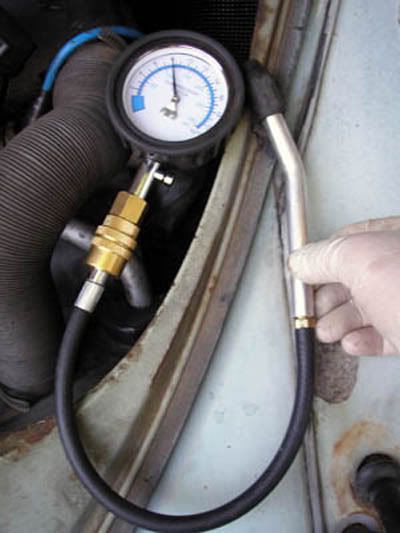
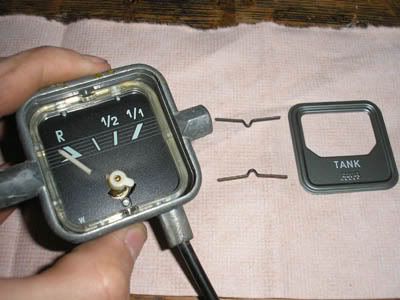
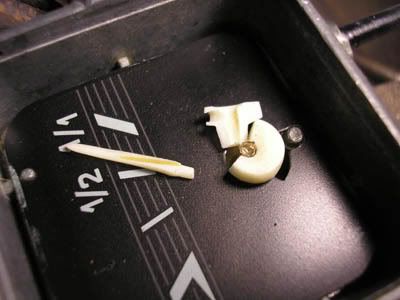
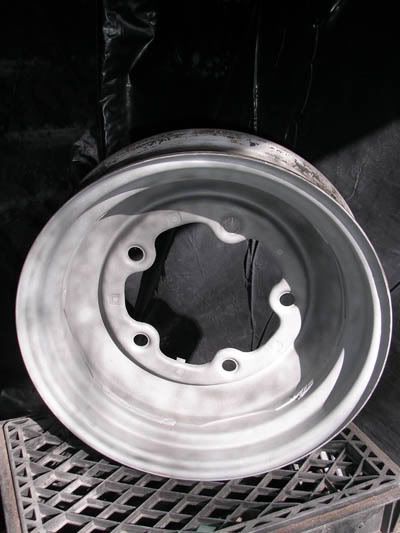
Here is the reason I took on this project. You see the contact point that is all pitted? This picture was taken just after I sanded down the commutator really well, because that contact point, and the one opposite, were severely corroded and I thought the brushes couldn't make contact, leaving me stranded in the parking lots.

Photobucket - Video and Image Hosting

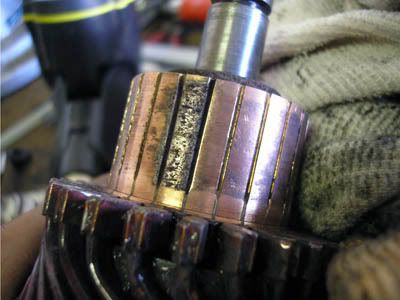
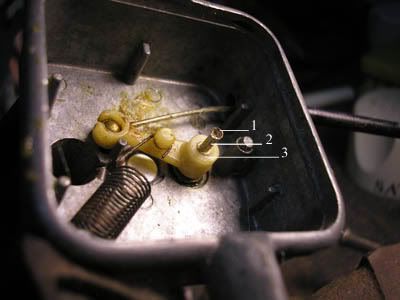
This picture was taken the next day, after being stranded again, and clearly there is a short in the armature somewhere, since I had replaced everything except for it.

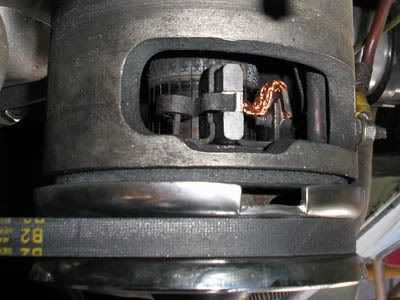
But back to the project. At this point you should have the cap, bushes, and case all removed, and the armature is still trapped by the top cap/ mounting bracket.

Photobucket - Video and Image Hosting

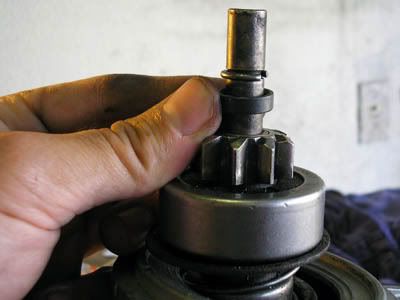
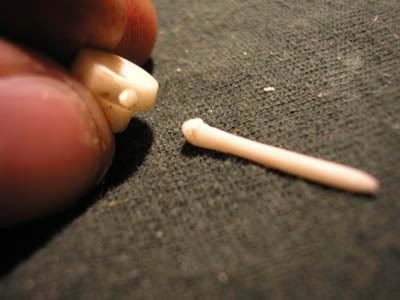
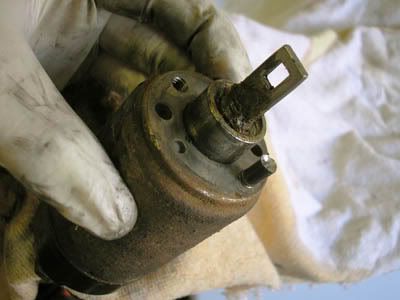
This little bugger had me scratchin' my noggin for a while. But the round piece needs to be tapped down to get the retaining ring off. Then you can slide the gear assembly off the armature axle. (To get the retaining ring back on, slide the round piece on first, then the ring. Use pliers to grip the bottom of the round piece and top of the axle to clip it back over. Start from the side opposite the ring gap.)

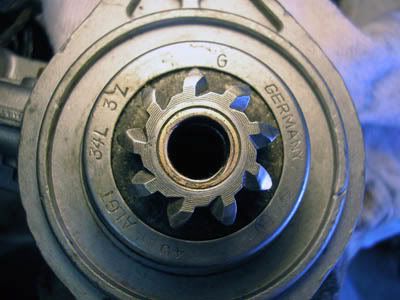
Now you have the 6v gear assembly, this is what you're going to put onto the 12v starter.

Go through the same process of disassembling the 12v starter and remove the gear assembly from it also. And if you have another 12v starter do the same thing, it'll be worth it.

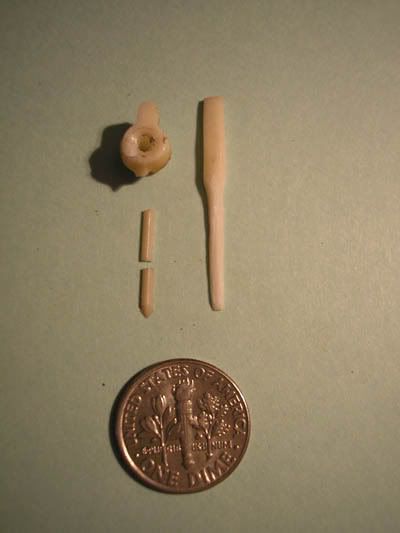
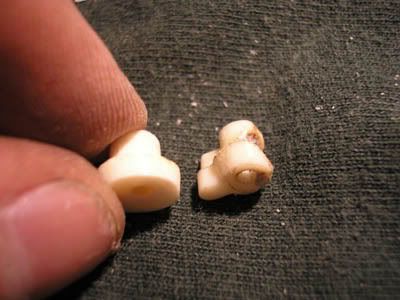
Once you have the 12v gear assembly/ies, find a socket or something that closely fits the circumference of the bushing inside the gear and gently tap them out from the inside, there are two of them in there. the rear one may be chipped, both of mine were, it shouldn't be too big of a deal, unless they are both demolished.

Photobucket - Video and Image Hosting

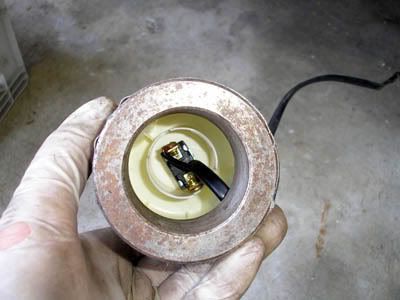
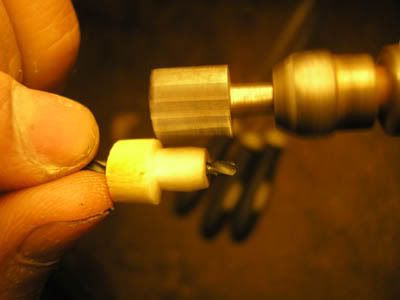
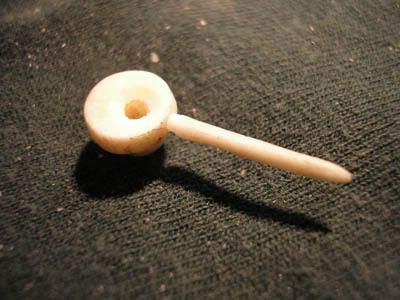
Here is the 12v starter bushing being put into the 6v starter bushing. A suspiciously precise fit. I cleaned the inside and out, then added loctite before pressing both in.

If you don't have a second starter, and your bushing are both immaculate, then you might only use one in the gear (though I don't suggest it). The reason you'll need an extra bushing is to put inside the bushing in the bellhouse, which will fit perfectly as well. This will save you the trouble of installing an after-market conversion bushing.

Photobucket - Video and Image Hosting

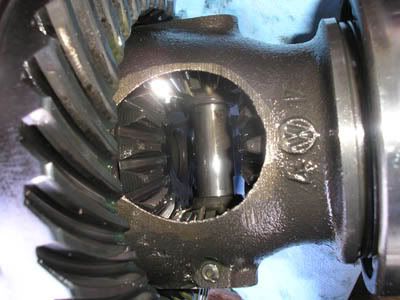
So as you can see here it is a perfect fit. Barely noticeable that one bushing is inside another.

Photobucket - Video and Image Hosting

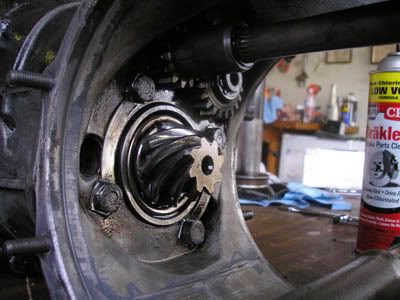
Another consideration I made was that the spiral shaft gears fit together. And of course they did.

Photobucket - Video and Image Hosting

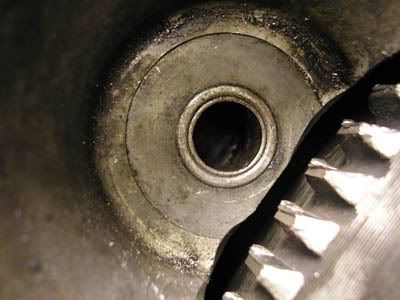
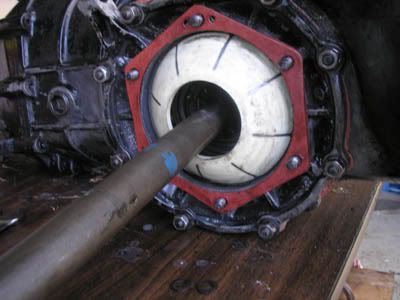
Here you can see I pressed an extra bushing into the bushing in the bellhouse. I cleaned and added loctite to this one as well. I add loctite to prevent the bushing from spinning, possibly causing it to come out, or shred to pieces.

Don't forget to re-lube the new bushings!

At this stage you've got your 6v gear assembly with it's new bushings, and so you're just going to re-assemble it onto the 12v starter. Hopefully you remember how it all goes back together. Don't lose the washers/shims that go on the rear of the armature axle, both under the brush bracket and under the nipple cap.

Earlier I was saying that you could possibly use this to put a 6v starter on a 12v flywheel. Well you're just going to remove the bushings from the 12v gear assembly, then put the gear on a 6v starter. It fits perfectly without bushings, but keep it well lubed.

Photobucket - Video and Image Hosting

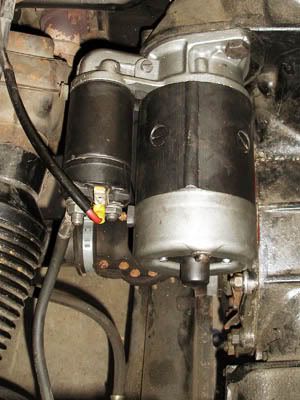
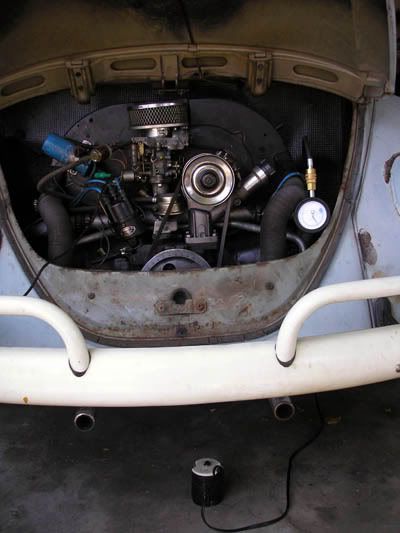
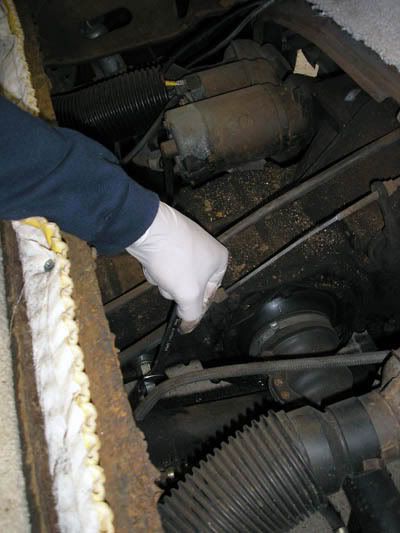
Finally, here is my new rebuilt 12v starter turning over a 6v flywheel. All done without even dropping the engine!

Post Script:
I am interested to know if the after-market bushings might fit inside the gear assembly as well? If not it might be a good new product!

UPDATE (9/2010):
That inner bushing finally disintegrated in my starter sometime this week. It looks like it spun out, maybe I should have used a glue instead of locktite.

Also the inner bushing in the bellhouse is ovaled-out and may go soon too. Both the outer bushings are intact and look unaffected. I'm not sure which one is causing the starter to intermittently go dead, I'm actually thinking the bellhouse bushing, since it would cause the greater lateral movement. But either way it's time for some new ones. I think I'm gonna look to have a new set machined.

I'd post a picture but there's nothing to see, just some flakes of bronze.

But hey, I got nearly three years to the day out of them! pretty stoked about that. I honestly didn't think it'd last more than a year.

Friday, August 17, 2007

Tune-Up

In June I took a month long vacation in North Carolina with my friend Jon Carpenter (Johnny Rad) and ol' Sugar was cooped up in the garage the whole time. But when I got back she was more than ready to stretch her legs, and started right up! I drover her around a bunch, going surfing and what not, put 500 on her odometer then did an early Tune-Up. I keep a little black book, not of phone numbers but of fill-ups and tune-ups.

Photo Sharing and Video Hosting at Photobucket

Here is the entry for the Tune-Up

8.3.07
odometer: 04540
Timing @ 31º, reset to 30º
Dwell good
Idle @ 800-50rpm (good)
Adjusted valves, all good but #2 was .004" (tight)
Compression:
#1 115psi
#2 112psi
#3 110psi
#4 115psi
Plugs were all good, #3 was black

I was getting a stumble when the engine wasn't hot enough and at high RPM. I thought this might have something to do with the distributor, since it felt like it was missing. I just switched it out for the 009. It didn't fix it but I noticed it less, I also upped the advance @ 31º.

200 miles later I put the 010 back in and set the timing @ 30º. over the next hundred miles the stumble got worse. Tonight I checked the timing and found it at 28º, and after reading up in TheSamba, I bumped up the advance to 33º, I haven't driven it yet, but I bet the stumble will be gone.

I also replaced the generator brushes because every now-and-then the generator light would go, and stay on, and then I'd screw with the brushes and it would go off. Also sometimes the starter would refuse to engage. I would short the terminals and only small sparks would appear. I really have no idea what it was, my best guess is that the battery wasn't being fully charged, but even after I would charge it I just couldn't get the draw I needed out of the battery. Then out of no where it would begin working again, and I could tell because all of the sudden I would get much larger sparks. But when this happens I would be stranded for no less than 20 minutes.

Photo Sharing and Video Hosting at Photobucket

Anyway, I bought the new ones and I think the spring had bottomed out on the brush guides, and I didn't really notice until I put in the new ones, which stuck out a good deal. The old ones were half the size of the new ones!

Photo Sharing and Video Hosting at Photobucket

The spring has so much more leverage on this new brush now!

So I did a full tune-up. tonight I changed the oil and found a lot of metal in it again. Fine dust to small chips and I think all of it ferrous. Of course between the last time and this time, the compression had dropped on all cylinders (except #2, it actually went up, which may have been due to a low battery the first time) and this is probably where the metal is coming from. The compression is still good though, and it is a lot more even than the first time I did it (due to #2). For lack of more interesting subjects I've included these pictures of the pressure gauge and a foot pedal I put together.

Photo Sharing and Video Hosting at Photobucket

The pressure gauge wouldn't fit in the tight spaces, and the hose adapter was too long also, so I bought a pipe fitting which made the hose-to-handle adaption shorter. here it is

Photo Sharing and Video Hosting at Photobucket

I'm much more proud of the foot pedal I made. It is a simple switch connected to the starter that I can put on the ground and press with my foot. I love it because I used a spray paint cap, drilled a hole for the switch and then duct taped it to a heavy metal bearing that perfectly fit the cap (I think the bearing came from a printing press), which makes it bottom heavy and steady. It makes everything so easy. For some reason I only thought to take a picture of the bottom, but you can see it on the floor in the picture above.

Photo Sharing and Video Hosting at Photobucket

Thursday, April 26, 2007

sorry, few pictures

It's been a few months since I have updated, in large part due to work and school. So I will compile the few projects that I have done.

Jan 28
On a leisurely drive out to Guadeloupe, just after finishing my wheel, I began to experience a wobble. I kept driving to get a better feel of where it was coming from, to the point that my horn button popped off in the worst of the shaking. Having read horror stories on the Samba where lug nuts could not grip into the surface of recent powder-coat jobs, my mind went to my wheel. I popped off the hubcap and found this.

Photo Sharing and Video Hosting at Photobucket

luckily I caught it in time. Though it may have done damage to the drum... oh well. It was a beautiful day at the beach and I happened to run into another Volkswagen enthusiast, Tom from Santa Maria, a really cool guy out fishing

Photo Sharing and Video Hosting at Photobucket

We talked and I reminded him of the upcoming Meet in the Middle BBQ/Bus Raffle an Najoqui Park.

Feb 18
I took a much needed day off at work for the Meet in the Middle VW BBQ. It was great, lots of cool people. I met up with Steven ("Grasshopper" on Central Coast VW Club) who I had arranged to buy a fuel gauge and two half baked Bosch 010 distributors, really cool guy, but drives water-cooled ; ) I also ran into Tom again and his father, and ate lunch with them and talked, really cool guys, funny too. Of course I am always so goo-goo eyed at these events that I only take the least amount of pictures and of the least cool things. But there are tons of pictures here. In fact I got in one of them!

Photo Sharing and Video Hosting at Photobucket

See? thats my blue bug and Im reaching in the window doing something, maybe fixing my parking brake which broke when I got there. =D Anyway it was a fun event. And I'm looking forward to the next one.

Feb...
While driving, my speedometer cable suddenly broke. I bit the bullet and bought the expensive German one. A week later I install it and no more than a 100 feet later it breaks again. This is one more example of the lesson I have learned that "what is broken is not what's wrong." I reluctantly tore into my speedometer for the mole (6.022 X10²³) time. I found a seized gear, I replaced it with a new gear from my other speedometer, went to Perry's Auto Wrecking to buy an overpriced used cable, and put everything back together, it's still working great.
Around the same time, I decided to do something with my running boards. Instead of painting them I wanted to put new vinyl on them. I drove over to Belluz upholstery and bought some leathery material that came very close to matching the white of my bumpers and wheels. I ground down the rust off the running boards, cut out the material, and used generous amounts of contact cement and well placed clamps. It all came out very well, and it looks great. I thought I had taken pictures while I was doing it but I guess not. This picture is from today and the running board is dirty from driving past flower fields during a rain.

Photo Sharing and Video Hosting at Photobucket

While I'm in this ambiguous time frame I'll add that I fixed up one of the Bosch 010 distributors and put it in. It reduced the flat spot dramatically but its not a miracle worker. I also bought that new fuel gauge from Steven which I installed at the show. My sweet lovin' bug is continually improving.

April 1-8
Worse than the flat spot of my old distributor was the front transaxle mount that was shot dead. The combination of these two formed a tag team worthy of American Gladiators. For a couple of weeks I had planned on using my Spring break to park the bug and dig into the tranny as well. Before doing this I wanted to take a compression test, considering the engine had developed a vibration and there has been metal in the oil twice now.
Cylinder 1: 120
Cylinder 2: 105
Cylinder 3: 125
Cylinder 4: 125

Well I found the offending cylinder. I squirted in oil and did it again.

Cylinder 1: 150
Cylinder 2: 145
Cylinder 3: 150
Cylinder 4: 150

So the rings on #2 are going bad. This makes me hate the guy I bought this engine from, that was his only responsibility and he screwed it up somehow. oh well it will survive a while. Back to the tranny.
I can not come close to explaining how my little "rear hatch" made this project so much easier. Things like clutch cable, engine-to-tranny bolts, starter motor, putting on axle boots, refilling tranny oil, heater ducts; all of these things that would have taken a considerable amount of time each were done in minutes.
In three hours I had the engine out, and the tranny (drum to drum) up on a table. With the engine out, I put on the engine tin that I forgot the last two times to do. While I was taking out the transaxle the front mount fell off in two pieces, it was bad. I spent the rest of the day and half of the next just cleaning the 43 years of buildup, nasty work.
My plan was to fix the oil leak from the side plates by replacing the gaskets, but curiosity had me tearing into the retaining plates also, for more thorough cleaning. For this job I bought: 2 tranny gasket kits, 1 set of axle boots, axle seal kits, gasgacinch, 10 beach towels (from the lost&found at work), 2 cans degreaser, 2 cans brakleen, all three mounts, and a can of black paint.
The side plate nuts would have been finger tight if the gunk had not prevented them from moving, which is why they leaked, and which is good to know. This was a fun project since I'd never really done much with a tranny or axle before. Here are some pictures I took. No real order here, or story, just interesting.

Photo Sharing and Video Hosting at Photobucket

Photo Sharing and Video Hosting at Photobucket

Photo Sharing and Video Hosting at Photobucket

Photo Sharing and Video Hosting at Photobucket

I put a new gasket on the nose cone, mostly so I could re-torque the bolts incase the bad mount had damaged it at all. I also replaced the main seal, but did not replace the t/o bearing or clutch. I bled and adjusted the brakes.

When I finally pulled it out of the garage the new mounts made such a difference! and it hasn't leaked a drop! But as I pulled mine out, I pulled my moms mustang in to replace the clutch and a disintegrated t/o bearing. I spent 6 hours trying to remove a pilot bearing, and I don't mean prying with a screwdriver. I tried everything from hydraulic extraction, to 4 or 5 fabricated bearing pullers!

and here is my beard after 4 months!

Photo Sharing and Video Hosting at Photobucket

Friday, January 19, 2007

Pattern of All Patience

So after I vacuumed out my bug, I saw the grill around the speedometer, and the really dirty screen backing them. So I sandblasted and painted them. They look really good now, and it makes such a difference to look at. Its cool how subtleties can do that.

Photobucket - Video and Image Hosting

Anyway, with my fuel gauge out, I decided to replace the broken plastic shield. I had the brilliant idea of replacing it with a CD case, I was very proud. The original was about .065" and the CD case was .040" so it was thinner but not by too much. I cut it out like you would cut glass, and it looked really good. In this picture you can only see the edges and the crack in the original, but you get the point.

Photobucket - Video and Image Hosting

I should have stopped there, but I wanted to shoot white grease into the wire tube to make the wire move more freely in it. I had to take it apart to get to the tube. Like a litany I repeated "don't break the needle", but like an idiot brute, time and time again, I broke the needle. This time it wasn't so much my fault as it was an unfortunate mistake, though.

Photobucket - Video and Image Hosting

Just like my speedometer I wanted to make a new one. I had beads made out of bone, and I knew it was going to be perfect. I ground down to the basic size, then filed and sanded it to within a hundredth of an inch in all dimensions.

Photobucket - Video and Image Hosting

I ground out the new center, using my dremel with a mill-like cutter.

Photobucket - Video and Image Hosting

A perfect match in depth.

Photobucket - Video and Image Hosting

I drilled a very small hole to press the needle into. an incredibly close tolerance hole, I couldn't believe it came out so perfectly.

Photobucket - Video and Image Hosting

After some shaping of the needle, it was a perfect fit. I couldn't make that nifty little tail for a counter-weight like the original had, but I offset the hole to achieve the same purpose.

Photobucket - Video and Image Hosting

I was meticulous. I was "the pattern of all patience." four hours in the making, and I couldn't have made a mistake if I had tried; everything was coming together perfectly.

Photobucket - Video and Image Hosting

I had it. Everything was together. At any point something could have broken, but it hadn't and it was now the last step. To cinch the top of the shaft over the new needle, like a rivet. This had to be done by hitting it with a tapered punch. so I did it.

Perfect. It worked perfectly. but the needle won't move with the wire! I knew the problem, the rivet wasn't pushing down hard enough. This time I ground off the tip of the punch so it would push down the sides more, and hit it.

no change. hit it again. still nothing. one more time. IT BREAKS!!!!! I kinda wanted to laugh.

I really wish I had a picture of it before it broke, because it looked really good.

Photobucket - Video and Image Hosting

Photobucket - Video and Image Hosting

This was my biggest hang-up from the very beginning. The needle goes over the shaft labeled #2, which has splines to make sure it catches the needle. But the lever labeled #3 rotates freely on that shaft, and only turns the needle by friction, because the needle is pushed down by the mushroomed shaft labeled #1. This was done so the needle could be adjusted, which is necessary. My hang-up is that I had to drill off the edges of the mushroom to take off the original broken needle, so I didn't have as much material in the shaft to mushroom over the new needle! I had originally solved this with a rubber o-ring that would catch the lever, but it wouldn't fit beneath the plate, and so I went along with the original design, which didn't work for me...

I'm keeping the needle, since it is in good shape, and I think at some point I will try again to fix it, we'll see how it goes.

Thursday, January 18, 2007

Thermo-Aesthetics

Well I've just finished the beginning of a long project of painting my wheels. I started with the spare tire. I muscled off the tire, then sandblasted the wheel, using the spiffy new media-blaster I got from santa. Here is what the wheels look like to begin with.

Photobucket - Video and Image Hosting

Starting on Thursday Jan. 11, I sandblasted and primed my first wheel.

Photobucket - Video and Image Hosting

I'm in love with this sandblaster. Now that I have it I want to sandblast everything. This wheel is down to bare metal.

Photobucket - Video and Image Hosting

On the 12th I added a second coat of primer, white this time. and let it dry for 48 hours

Photobucket - Video and Image Hosting

Sunday the 14th, 48 hours later, I added color; it's the same as the bumpers, Ivory gloss. I sprayed multiple coats, then let it dry 48 hours. Tuesday the 16th I added the clear gloss coats and let it dry another 48 hours.

Photobucket - Video and Image Hosting

Thursday the 18th it was dry and ready to put back on. I muscled on the tire being very mindful of the new paint, but still I managed to chip off a good strip on the front of the wheel, down to the first coat of primer. That really ticked me off, but this wheel is the practice run for the rest of them, being the spare. I'm going to practice painting bare metal, because I've had chipping on my bumpers too. I think it is from not sanding the primer coat before painting, which I didn't think was necessary, but we'll find out with my experiments. Anyway, I patched up the scars so they only look a little lumpy, and then stuck it on. I'll admit I'm not as stoked on it as I first thought I would be. There is just something wrong with the aesthetics.

Photobucket - Video and Image Hosting

In this picture I Photoshoped the rear wheel, running board, and blinker to match. This should be pretty close to what they will look like. I'm undecided about painting the running board, but I think that is another aesthetics problem.

Photobucket - Video and Image Hosting

On to other projects! I finally found the use for my tranny-hatch!! because my transaxle leaks so much gear oil, I have to refill it every now and again. Before, it involved jacking up the car, removing a wheel, climbing under, and squeezing into very tight, oily spaces. but now, I just pop the hatch, and BAM! its done! I am so very stoked.

Photobucket - Video and Image Hosting

and I also painted my stick shifter. I did it in a hurry, since my daily driver is useless without it, but it looks good. This was prompted by the rattling noise it made while driving. I had only planned on re-greasing it, but I went a step further and painted it too.

Photobucket - Video and Image Hosting